To automate a process we are going to “Task scheduler”, to run the program everyday at 5 PM.
Using AWS CLI, The task scheduler will sync all the files stored in a folder in the Windows OS to the target S3 Bucket
What is AWS CLI?
We control any AWS resource from the command prompt and automate them through scripts.
Different Version Of AWS CLI
Version1.x : A version that can be used in Production environments.
Version 2.x : A preview version which is more suitable to be used in Testing Environments.
EXAMPLE
Below is the aws cli command using which we can copy a file from local machine/server to S3 bucket
aws s3 cp filename s3://bucketname/
INSTALLING AWS CLI on Windows
AWS CLI can be installed using .msi file
Or using pip, a package manager for python.
METHOD 1 : INSTALLING USING .MSI INSTALLER
Lets download and install the aws cli .msi package
Download the package suitable for your operating system.
Open the provided link in the browser, which will download the .msi file.
For Windows 64-bit OS
https://s3.amazonaws.com/aws-cli/AWSCLI64PY3.msi
For Windows 32-bit OS
https://s3.amazonaws.com/aws-cli/AWSCLI32PY3.msi

After downloading the file. Run the .msi installer.
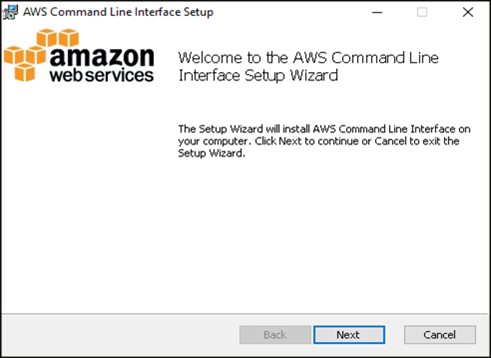
Click Run, You can see the following page.
Click Next
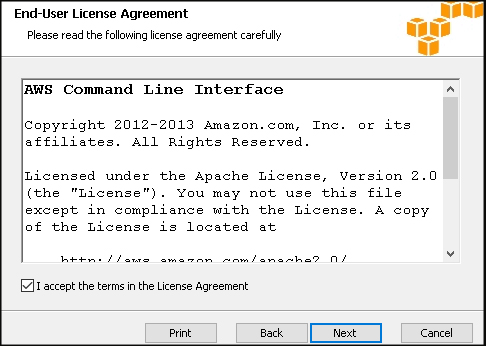
Accept the License Agreement then click Next (two times).
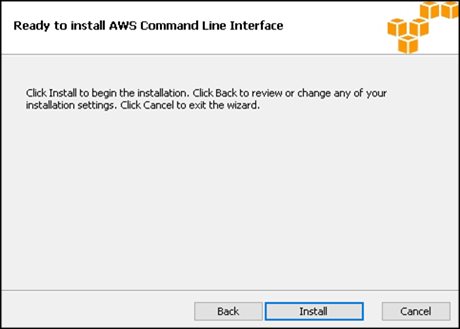
And press Install
At last, Click Finish.
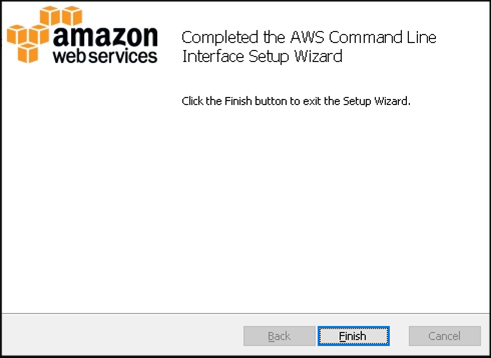
AWS CLI is installed.
Now Let's verify the AWS CLI installation.
Open the command prompt or the powershell and execute the below command.
aws --version
You should see the response below.

AWS CLI is installed and successfully verified.
METHOD 2 : INSTALLING AWS CLI ON WINDOWS USING PIP
For this, First we need to download and install the python package.
Latest version can be downloaded using the below link.
https://www.python.org/downloads/windows/
Download it and then, Click Run
You may also Like: AWS vs Azure vs Google Cloud
Make sure Add Python 3.8 to PATH is checked and then press Install Now
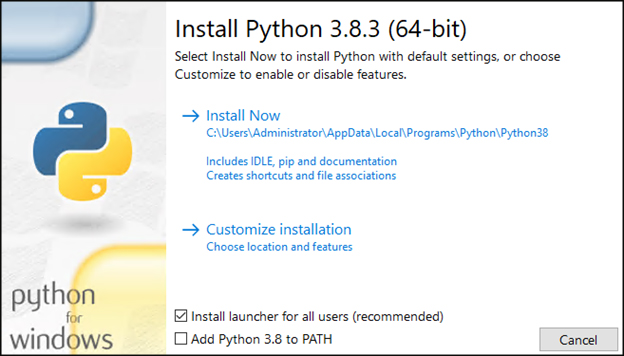

Once the installation is completed.
Open the command prompt and then execute the below command,
python --version
It will reply with the version of python installed on the system.
Lets install aws cli using python pip,
pip3 install awscli
pip3 is used install aws cli, because installed version of python is 3.8


AWS CLI using pip is successfully installed.
Run the below command to check the version of AWS CLI and to verify the installation.
aws --version
Configuring AWS CLI
Now we have to configure aws cli, For that we need AWS access_key and secret_key. If you don't have one, You can go ahead and create it under IAM users.
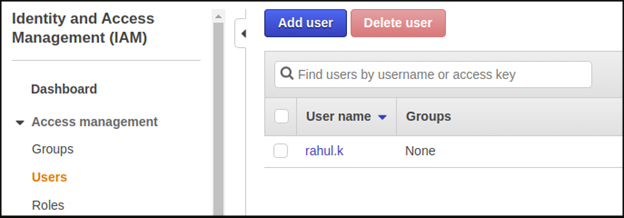
Go to IAM Console → Click Users, Choose Add user,
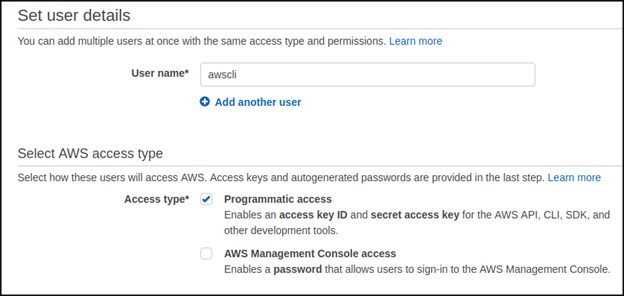
Enter an username and then select programmatic access.
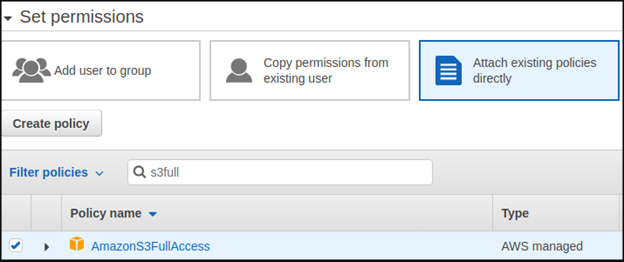
Click Next: Permissions, Select “Attach existing policies directly” and then choose S3 bucket full access permission to this user.
Finally click Create user
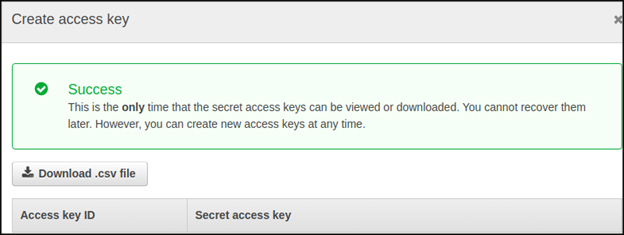
You will get the access key ID and secret access key which can be downloaded to the local machine.
Run the below command to configure AWS CLI,
aws configure
Which will ask for ACCESS_KEY, SECRET_KEY and AWS_REGION.

Pass the required values, Now the AWS CLI is successfully configured in the windows OS.
What Is A Task Scheduler?
Task scheduler is a tool which comes with windows by default, is used to execute the predefined tasks automatically when required.
CREATING TASKS USING TASK SCHEDULER
To create Basic tasks,
RDP to the Windows EC2 Instance and then search for Schedule tasks
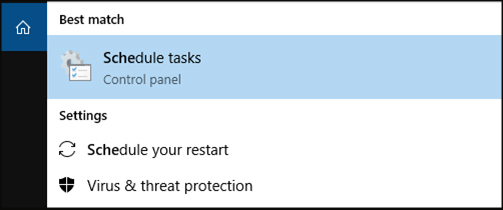
Which will open the Task Scheduler.
On the Right Hand side, Creating tasks, Importing tasks, Disabling task history, To display all running tasks are the available options.
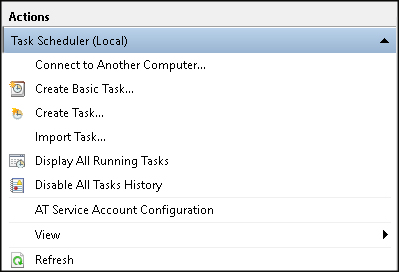
To Create a new task, Under Actions, Click Create Basic Task
Enter a name for the Task
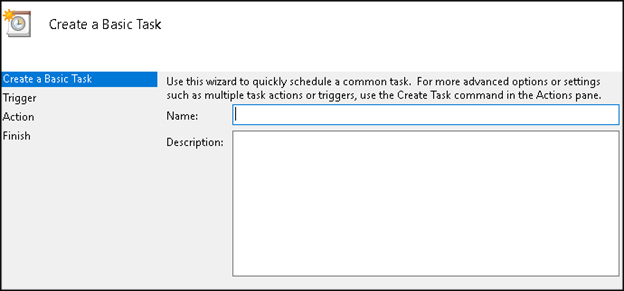
Next we have to choose how often the task should be executed such as such as weekly, monthly, One time, When log on, When computer starts, Or when specific event is logged.
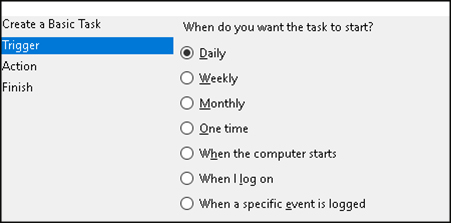
Click Next , Depending on the trigger, You can provide Start time and recur every etc.

In the above example, Task scheduler is configured to execute the task everyday at 11:55 PM.
Click Next
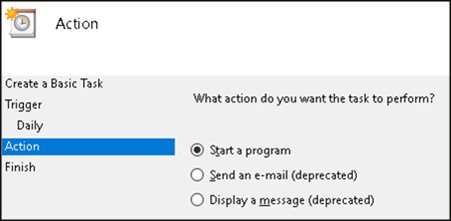
Choose an Action as Start a program
.png)
Now Provide a program or a script to the Task scheduler to execute everyday.
To Create a script, Open the File explorer, Select a folder in a drive.
Right Click and Click New, Choose Text Document
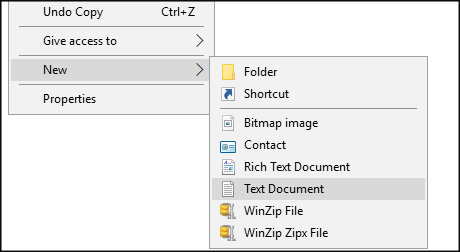
Enter a name for the file and save the file as .bat (known as batch file),
Example, test.bat
It asks for the confirmation, Click Yes
To add/modify the contents of the .bat file.
Select the file & Right click it, then click Edit
For this tutorial, We will add the command which will sync all the files in a folder from Windows OS to S3 bucket.
Enter the below command in the file
aws s3 sync C:\folder\. s3://bucket-name/
Make sure to enter the correct values such as folder name and bucker name
Finally Save and close the file.
Now, Go the Task Scheduler
Click Browse, select the .bat file that you have created in the last step.
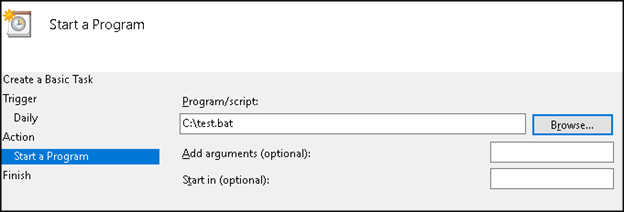
Choose Next and the Summary of the task will be presented.
Click Finish.
To perform manual execution of the task, Choose Task Scheduler Library, Select the task which was created.
On the right Side, Choose Run to start the task manually
Click History to check the history of the task.

To change the property of the Task, Select the task, Right click and click properties.
To modify Triggers, Select task and then press Edit to make the required changes.
Under Actions, You can change the batch file.
Conclusion:
We have successfully installed and configured AWS CLI and we have set up a scheduled task to automatically backup the files stored in a folder in the Windows OS to the S3 bucket.
Also Read: How to Create SQL Server Database in AWS RDS
.png?lang=en-US&ext=.png)

.webp?lang=en-US&ext=.webp)

.webp?lang=en-US&ext=.webp)
